

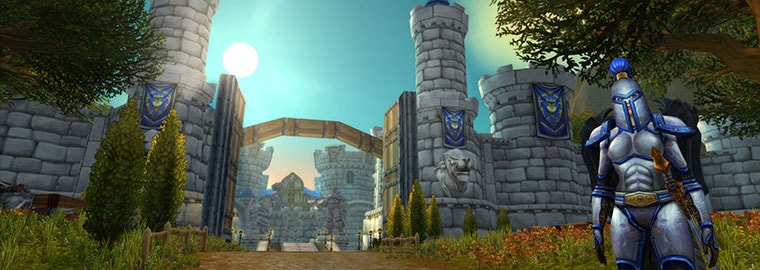
It’s a big, big world out there, and you’ll discover it a step at a time as you move down the road from Northshire to your new destination: Goldshire.
As in our previous guide, we’ll be walking you through levels 5 through 10 of the Human starting experience as the Warrior class—but a lot of this information will be relevant no matter which class you choose. Let’s get going!
As you head out of the abbey gates, you’ll want to pick up the quest from Falkhaan Isenstrider. He’ll send you to speak to the innkeeper at the Lion’s Pride Inn. It’s not a long journey and sticking to the south leading path is a pretty safe way to go. Don’t be too worried if you come across other players dueling in town.
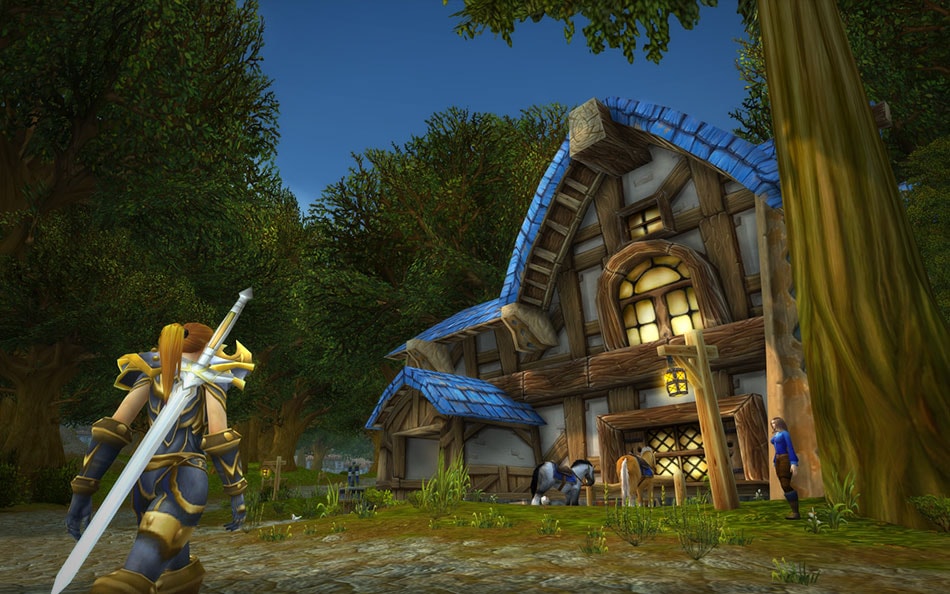
Goldshire
What’s Here:
- Lion’s Pride Inn - You’ll be able to set your Hearthstone here after speaking to an Innkeeper, allowing you to instantly return if you need a break from questing afield.
- Class Trainers - They’ll provide some guidance and additional information as you advance.
- Profession Trainers - You’ll be able to pick up a Profession or two and start your apprenticeship.
- Vendors - Don’t forget to sell off any items you don’t need or want anymore. When in doubt, most items with gray text can go.
- Flight Master - You’ll be able to quickly travel around Azeroth (for a small fee) as you discover new flight paths.
Upon arriving in town, you’ll notice many new quests are available to you. You’ll want to head into the Lion’s Pride Inn first to talk with Innkeeper Farley. You’ll turn in a quest to him, and you can now make the inn your home by clicking the option “Make this inn your home.” By doing this, you’ll bind the Hearthstone in your backpack to this location, and be able to use it to travel back to the inn. Your Hearthstone has a 30-minute cooldown (meaning you can only use it once every 30 minutes), but it’s very handy when you just don’t want to walk all the way back to the inn from a long hard day of slaying monsters (or picking flowers).
But wait, there’s more! When you log out at an inn (or at any designated “rest” area) after playing, you’ll also start accruing Rested experience. Rested experience will provide a bonus to your regular experience (200% of normal experience gained) when you kill monsters. Your experience bar will be blue while you are getting bonus experience and will revert back to purple when you’re only able to earn normal experience.
Resting Tip: A good way to tell if you’re in an area in which you’re earning Rested experience is to look at your character frame in the upper left corner of your screen. You’ll see a small text bubble that says “zzz,” and the name plate and character image will have a soft golden glow pulsing around it.
Take a moment to check the gear in your backpack against what you’re wearing. Do you have all of the latest and greatest equipped? Once you’ve equipped any new items, it’s time to start gathering quests. To find quest givers, take a look at your map for yellow exclamation points. A slightly faded out exclamation point means that the quest giver is within a building. Once you’re close (or in the building), it will show up on your mini map as a brighter yellow. Silver exclamation points mean that the quest isn’t available until you get to a higher level or complete other objectives first. Before you head out on your quests, it’s worth taking a moment or two to sell any items you no longer want (we hope you’ve been picking up anything you can to sell for money)—that way you’ll have enough room in your bags for more quest rewards or loot.
Ration Tip: You can eat and drink at the same time. At lower levels, eating and drinking isn’t as important since you rejuvenate health (and mana, if you have it) quickly. As you get stronger, however, you’ll want to sit down and have a little something to eat and/or drink to regain health or mana more quickly between fights. Since Warriors don’t need mana, you only need to keep food on you. If you decide to play a character that uses mana, it’s worth noting that you can eat and drink at the same time and don’t need to wait for one to complete before doing another. Just make sure that when you do sit down to eat that you do so away from any monsters that might aggro (attack) you. No one likes to have their meal interrupted.
One of your quests will tell you to go to the human capital city of Stormwind. It’s worth a quick gryphon ride just to see what all the fuss is about.Once you’ve accepted the quest, right click the Gryphon Master and select your destination on the map that will pop up (Stormwind, Elwynn). It’s one of the closest items on the map and will indicate which it is when you put your mouse pointer over it. This ride will be free, but future rides will cost a wee bit of coin.
When you arrive, you’ll first walk out into the Trade District of the city. Your quest destination is in Old Town. The city may seem a little overwhelming at first, but a push of your map key (M) will show you where you need to go. You can also left click on the guards to ask for directions to many key locations within the city. You’ll see other quests show up on your mini map while in the city, but it might be best to leave those until a little bit later. Once you’ve completed your quest, it’s time to hop another ride back to Goldshire.
Travel Tip: You’ll notice that some flight paths are already discovered when you talk with any Gryphon Masters, but not all flight paths will show up though until you find them in the field. When you encounter a Flight Point that you haven’t yet discovered, the Flight Master will have a green exclamation point over their heads. Simply click on them like you would a quest giver, and you’ll learn new flight paths that connect to your newly discovered location.
Back in Goldshire, you’ll want to turn in your quest, check your equipment, and then double-check your map to see where you should go next. It’s generally a good idea to go to the area where you have the most quests together. If you’re feeling adventurous and are ready to explore a bit more, that’s OK too. A lot of the available quests will direct you to various areas in the city for a few errands.
Map Tip: Elwynn Forest is comprised of Northshire and Stormwind in the north; Westbrook Garrison to the West; Stonefield Farm, Maclure Vinyards, and Fargodeep Mines to the south; Tower of Azora and Eastville Logging Camp to the east; Brackwell Pumpkin patch to the southeast; and Jasperlode Mine and Stone Cairn Lake to the northeast. However, these are just some of the main areas that you’ll get to explore. You’ll discover many other locations within Elwynn Forest as well.
As you level, you’ll notice that the monsters you encounter get progressively tougher. Make sure you’re paying close attention to which ones you target. Some are Rare Elites (identified by their silver dragon portrait), and some are Elite (gold dragon portrait), which are extra tough and may need a group of other players to defeat them.
If you run up against such a creature or encounter more creatures than you can handle on your own and find yourself dead, don’t panic! You’ll be able to run back to your corpse from the Spirit Healer to resurrect. (Alternately, you can right-click the Spirit Healer to resurrect at that location.) To find your corpse, head toward the small grave marker on your mini map. Just make sure to resurrect your character in a safe location. You won’t be completely healthy or (in the case of mana users) return to full mana for a little while after you resurrect. Death is relatively painless at lower levels, and you’ll be able to get right back in to the action without any penalty or damage done to the gear that you’re wearing—that will begin once you reach level 10, but let’s not dwell on that right now.
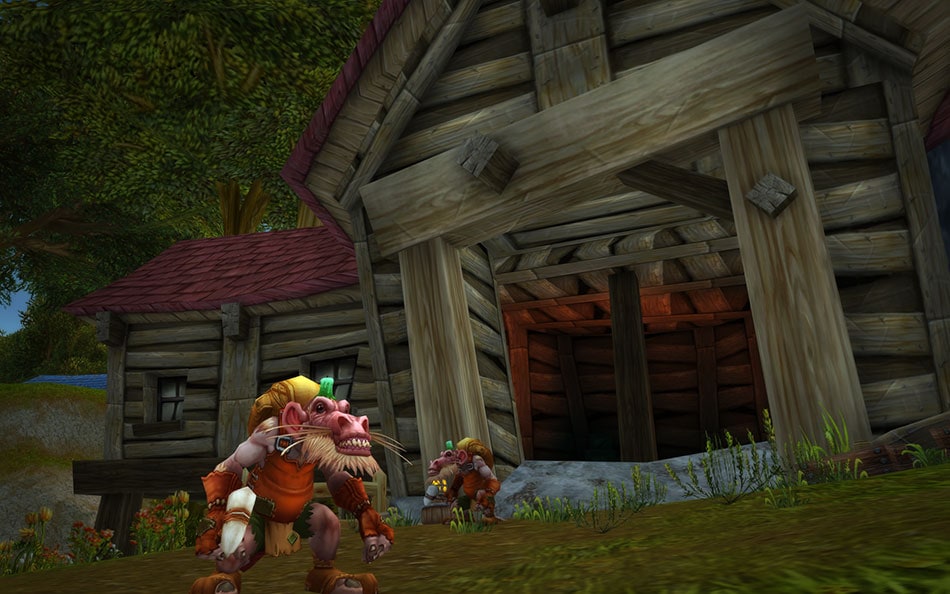
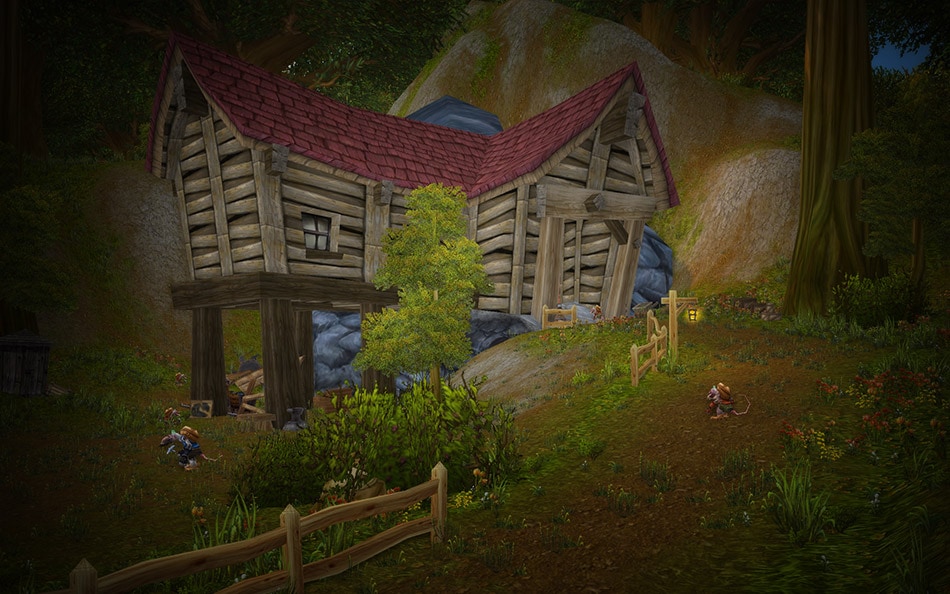
One of your quests will ask you to head to one of the local mines to deal with some nasty kobolds. Kobolds are infamous for their “You no take candle!” battlecry. Don’t let that stop you from taking exactly that—and a little gold—and snooping around the mine before you return to Goldshire to get your next batch of quests. When in doubt, don’t forget to open your Quest Log (L) and read through your quests again so that you know what you need to do to complete them. A walk south to the Stonefield Farm before going east or north might be a good place to start.
You should be getting the hang of things by now, but don’t get too comfortable while running from quest to quest. It’s easy to get overwhelmed by hostile creatures when you’re not paying attention—plus, there are bandits ’round these parts . . . and wolves, bears, and angry candle-coveting kobolds. And cows—but they just go “moo,” so don’t worry about them too much.
You’ll face a powerful monster named Goldtooth along the way. If he’s a bit too tough for you right now, don’t despair. Finish some of your other quests and get a little revenge (always best served cold) later when you’ve leveled a bit more.
Going Back Tip: If you come across a monster that’s just a bit too tough for you, you can always come back when you’ve gained another level or two. There’s also no harm in running away when you need to. You can try another area for a while and see if that goes a bit better for you before making a triumphant return. Keep in mind that sometimes, after a certain point in battle, a monster might run away from you. This will give you a slight breather before finishing them off . . . or it could bring back trouble if they happen to run into a friend.
‘Ware the Murlocs!
After facing kobolds, you’ll face the most fearsome of creatures at the Crystal Lake just to the east of Goldshire. We suggest a “slow and steady” approach here . . . because, you see, you can never just have one murloc. You’ll grow to either love or hate these gurgling little creatures, but no matter what, when you think they’re alone, there’s almost always more close by waiting to join the battle. In general, it’s always good to be aware of where you’ve chosen to take on a foe—otherwise, what will have started as a one on one encounter can quickly and easily become a two or three on one battle to the death. Tread cautiously, and you may live to fight another day!
To help you in sticky situations, it’s a good idea to keep a few healing potions at hand. You can use (right-click) one potion each time you’re in combat. Drag these or other “usable” items into your action bar at the bottom of your screen for quick access.
Spawn Location Tip: Sometimes a little scouting will help you find alternative spawning locations for monsters. The murlocs along the river to the south are less likely to be grouped up and can be more easily picked off than the ones near the lake.
Once you’ve completed the quests at the Stonefield Farm (and those associated with them), follow the path east to meet up with Guard Thomas. He has another quest for you, but you’ll also see a Bounty Board nearby with an exclamation point over it like quest givers have. Bounty Boards will generally have a named NPC or monster they want you to hunt down, kill, and/or collect items from. Pick those quests up too—more experience and rewards mean a faster path toward becoming a hero of Azeroth!
Reward Tip: The higher in character level you go, the better the rewards. Many later pieces of gear have additional stats on them that will add to your base stats, such as additional Strength or Stamina. If you don’t see a reward you can use, that’s OK too. They can usually be sold to vendors for money. Pick the one worth the most, sell to a vendor, and profit!
You won’t be far off from reaching level 9, and when you do, you should receive a notification that you’ve learned a new Warrior stance: Defensive Stance. (If you have the tutorial on, you’ll see a large pop-up that explains the new ability.) This stance is great for “tanking” (absorbing damage for others) in groups outside or in dungeons. You’ll do less damage in Defensive Stance, but you’ll take less damage, too.
As you progress through this area and turn quests back in to Guard Thomas, he’ll eventually have a quest that leads you to Westfall, a completely different zone to the southwest. It’s up to you to decide whether you want to move on or if you want to finish the quests you have in Elwynn Forest. If you’re simply interested in leveling quickly, you may decide to move on—though there’s risk there if you do. Keep in mind that the creatures you will face will be higher level and have more powerful abilities. If you’re interested in learning more of the story of your new home, then consider completing the entire zone. You’ll also gain exploration experience and an Achievement (found under Achievements > Exploration > Eastern Kingdoms) for discovering all of the areas within Elwynn Forest. Note that you won’t be making any progress toward the Loremaster Achievement by completing all of the quests in Elwynn, but Westfall’s quests do count—it might be worth checking out all the Achievement details to learn what you’re going to need.
So You’re Level 10
You’ll likely reach level 10 prior to completing all of the quests in Elwynn Forest, which opens up a new opportunity to customize your character—along with some other new opportunities for adventure.
At level 10, the option to pick a Class Specialization will open up. A new pop-up notification will highlight the new Specialization & Talents pane (N) and will provide additional information on the what choices are available to you. There are three Specializations that will open up for Warriors: Arms, Fury, and Protection. Take some time to read over the information carefully before choosing. No matter what, you’ll definitely want to choose one before moving on. Once you do, you can check out the new abilities available to you (both passive and active) by opening the Spellbook & Abilities tab (P).
At level 10, you’ll also be able to join Battlegrounds to take part in player-vs.-player (PvP) competition—so if you’re up for testing what you’ve learned against other players in combat, here’s your chance!
To see all of the available quests in Elwynn Forest, visit Wowhead’s handy database here. For information on other class Specializations, visit here.
You’re off to a great start toward claiming your spot in Azeroth history, so we’ll bid you farewell until next time. Good hunting!